Overview
In this article, we'll detail the use of Aline eMAR's Cycle Fill Check In tool.
For organizations or communities that have the Cycle Fill Check In tool enabled, users will be able to create manifests, or checklists, for cycle fill labeled medications in order to compare pharmacy deliveries to Aline eMAR Cycle Fill documentation. This process allows accurate cycle fill check ins and easy reporting to the pharmacy for any potential missing shipments.
Check out the tutorial video or the specific steps to complete a cycle fill check in below to learn more!
Steps to Complete a Cycle Fill Check In
Step 1: After logging into Aline eMAR, select the Waffle Menu and then Select Cycle Fill Check In.
Please Note: if you do not see the Cycle Fill Check In tool available in the Waffle Menu, you'll need to enable the tool via Facility Maintenance or by contacting your Aline Account Manager.

Step 2: The Cycle Fill Check In page will display. From here, users can select previous cycle fills to review, pick up ongoing cycle fill checks ins that are still in progress, or start a new cycle fill check in.
Completed check ins will display a green check mark under the Check-In List Status column, and incomplete or ongoing check ins will display a red X.
To begin a new check in, select the current date or date of the delivery, the specific location, or grouping of residents / carts) the delivery was made to, and then select + Create.

Step 3: The new Cycle Fill Check In manifest will display.
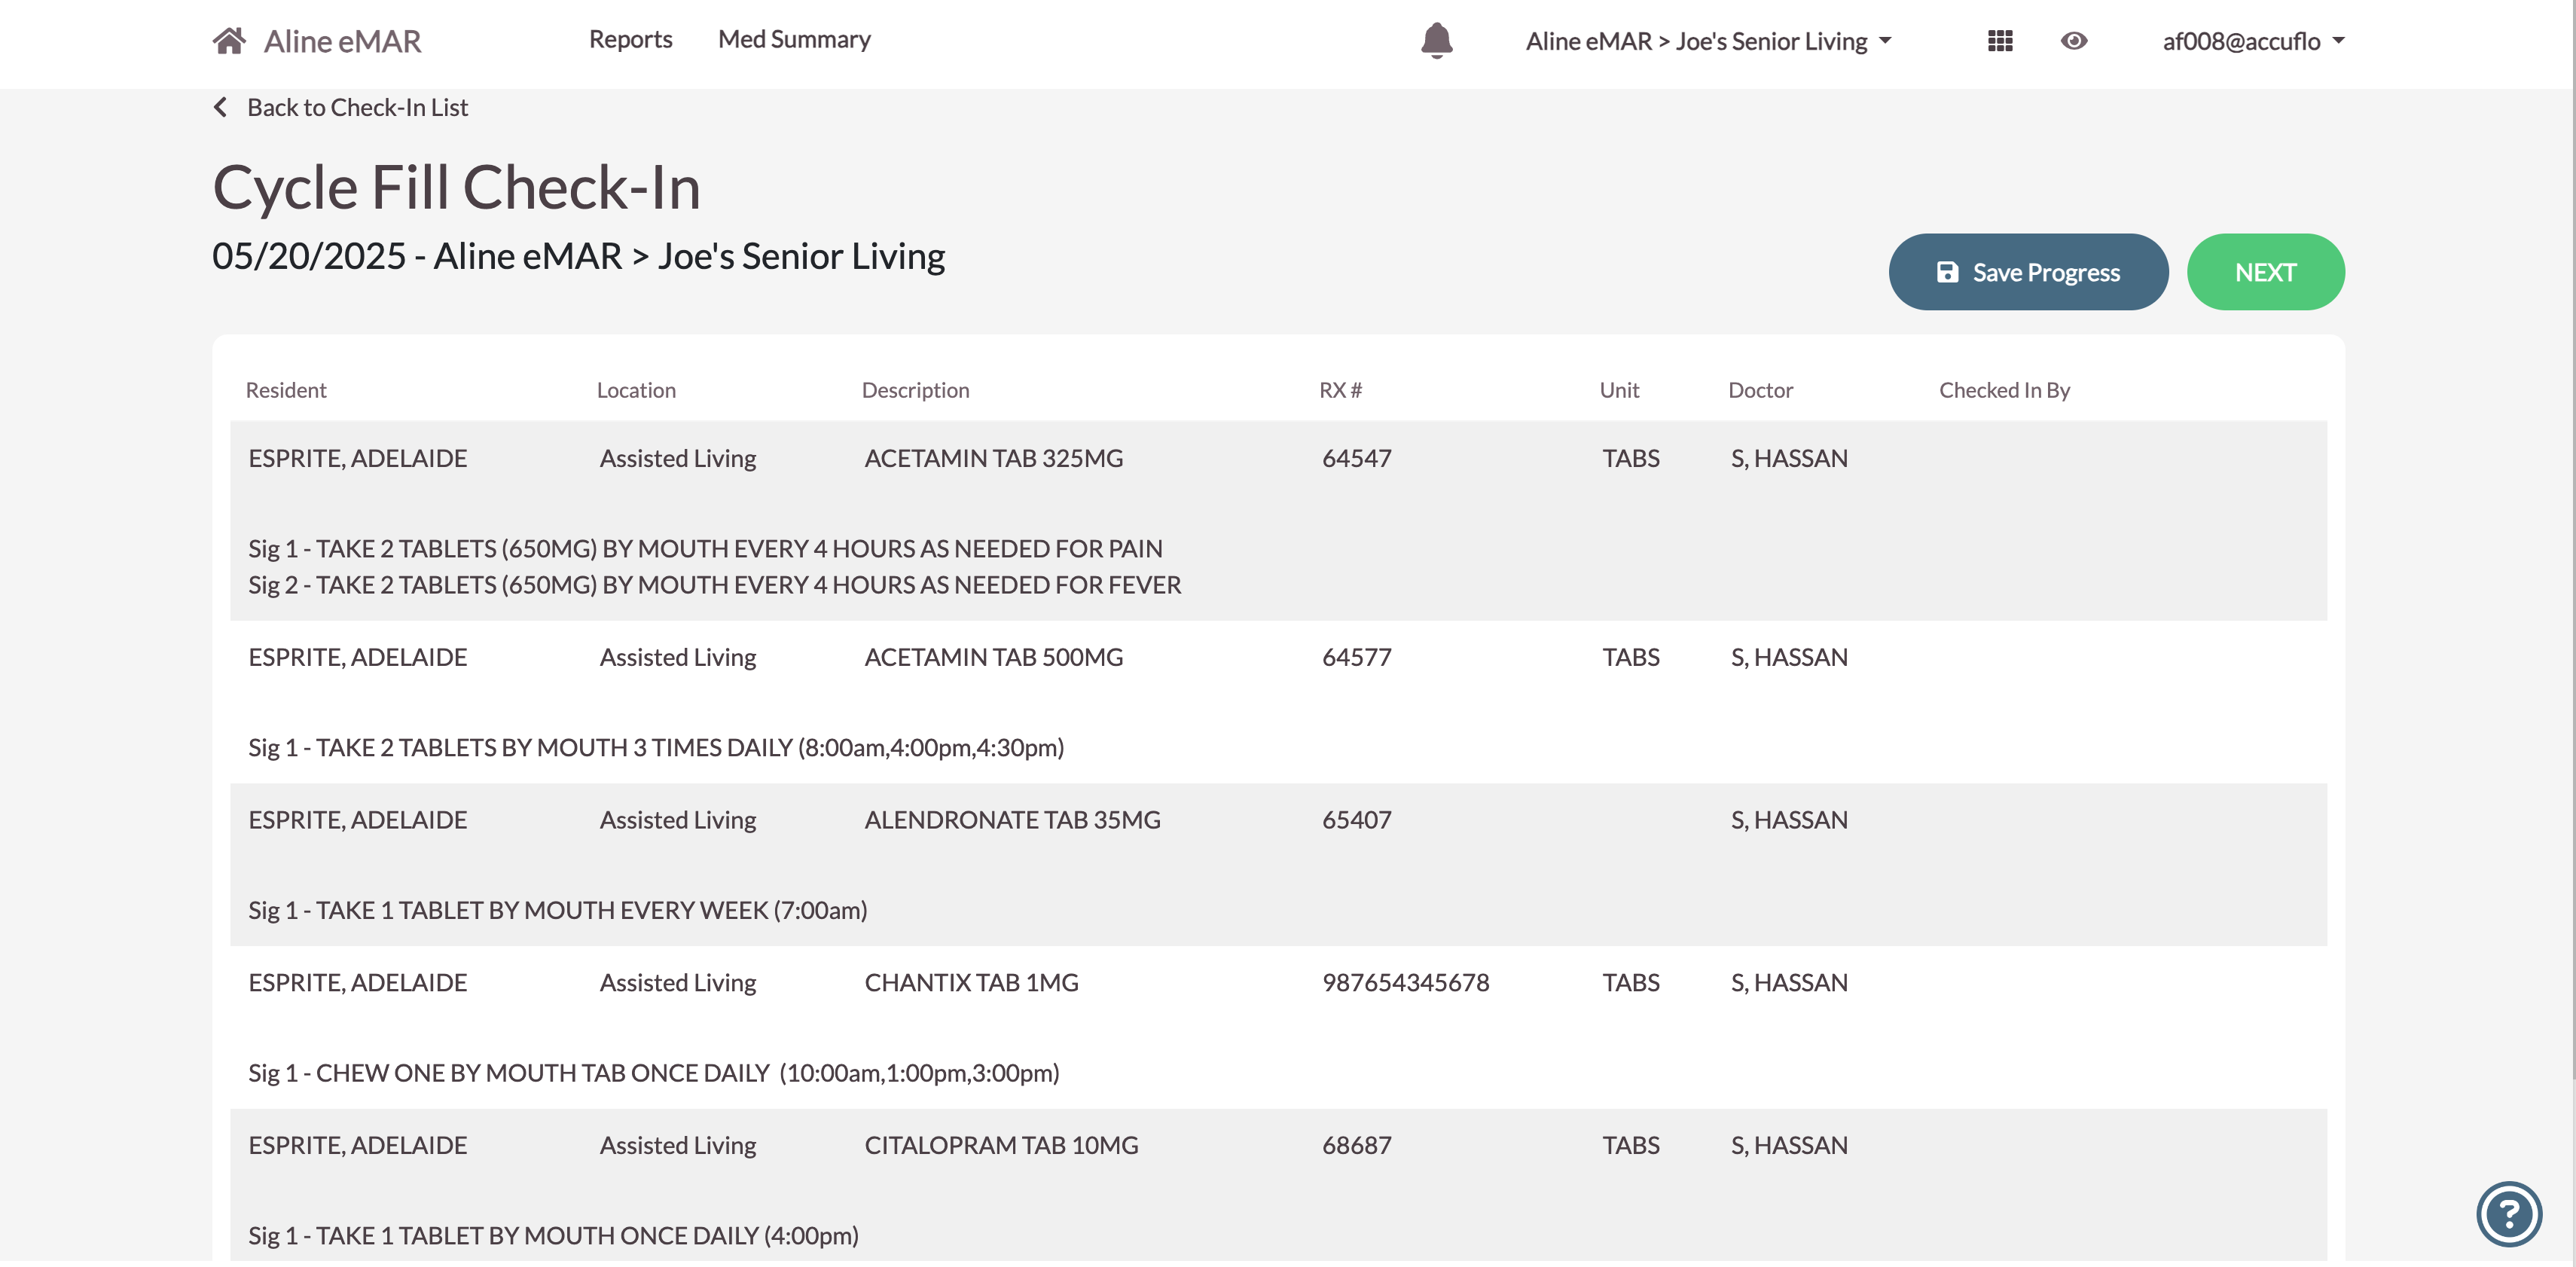
Data displaying on the manifest includes the resident name, the location of the resident, the description and instructions for the medication, the medication's RX number, the unit the medication is measured in, and the ordering physician or doctor.
Simply compare the orders and select the order, or scan the barcode on the medication's packaging / multi-dose pack to check the item off on the manifest. Repeat this process until all items have been checked in.
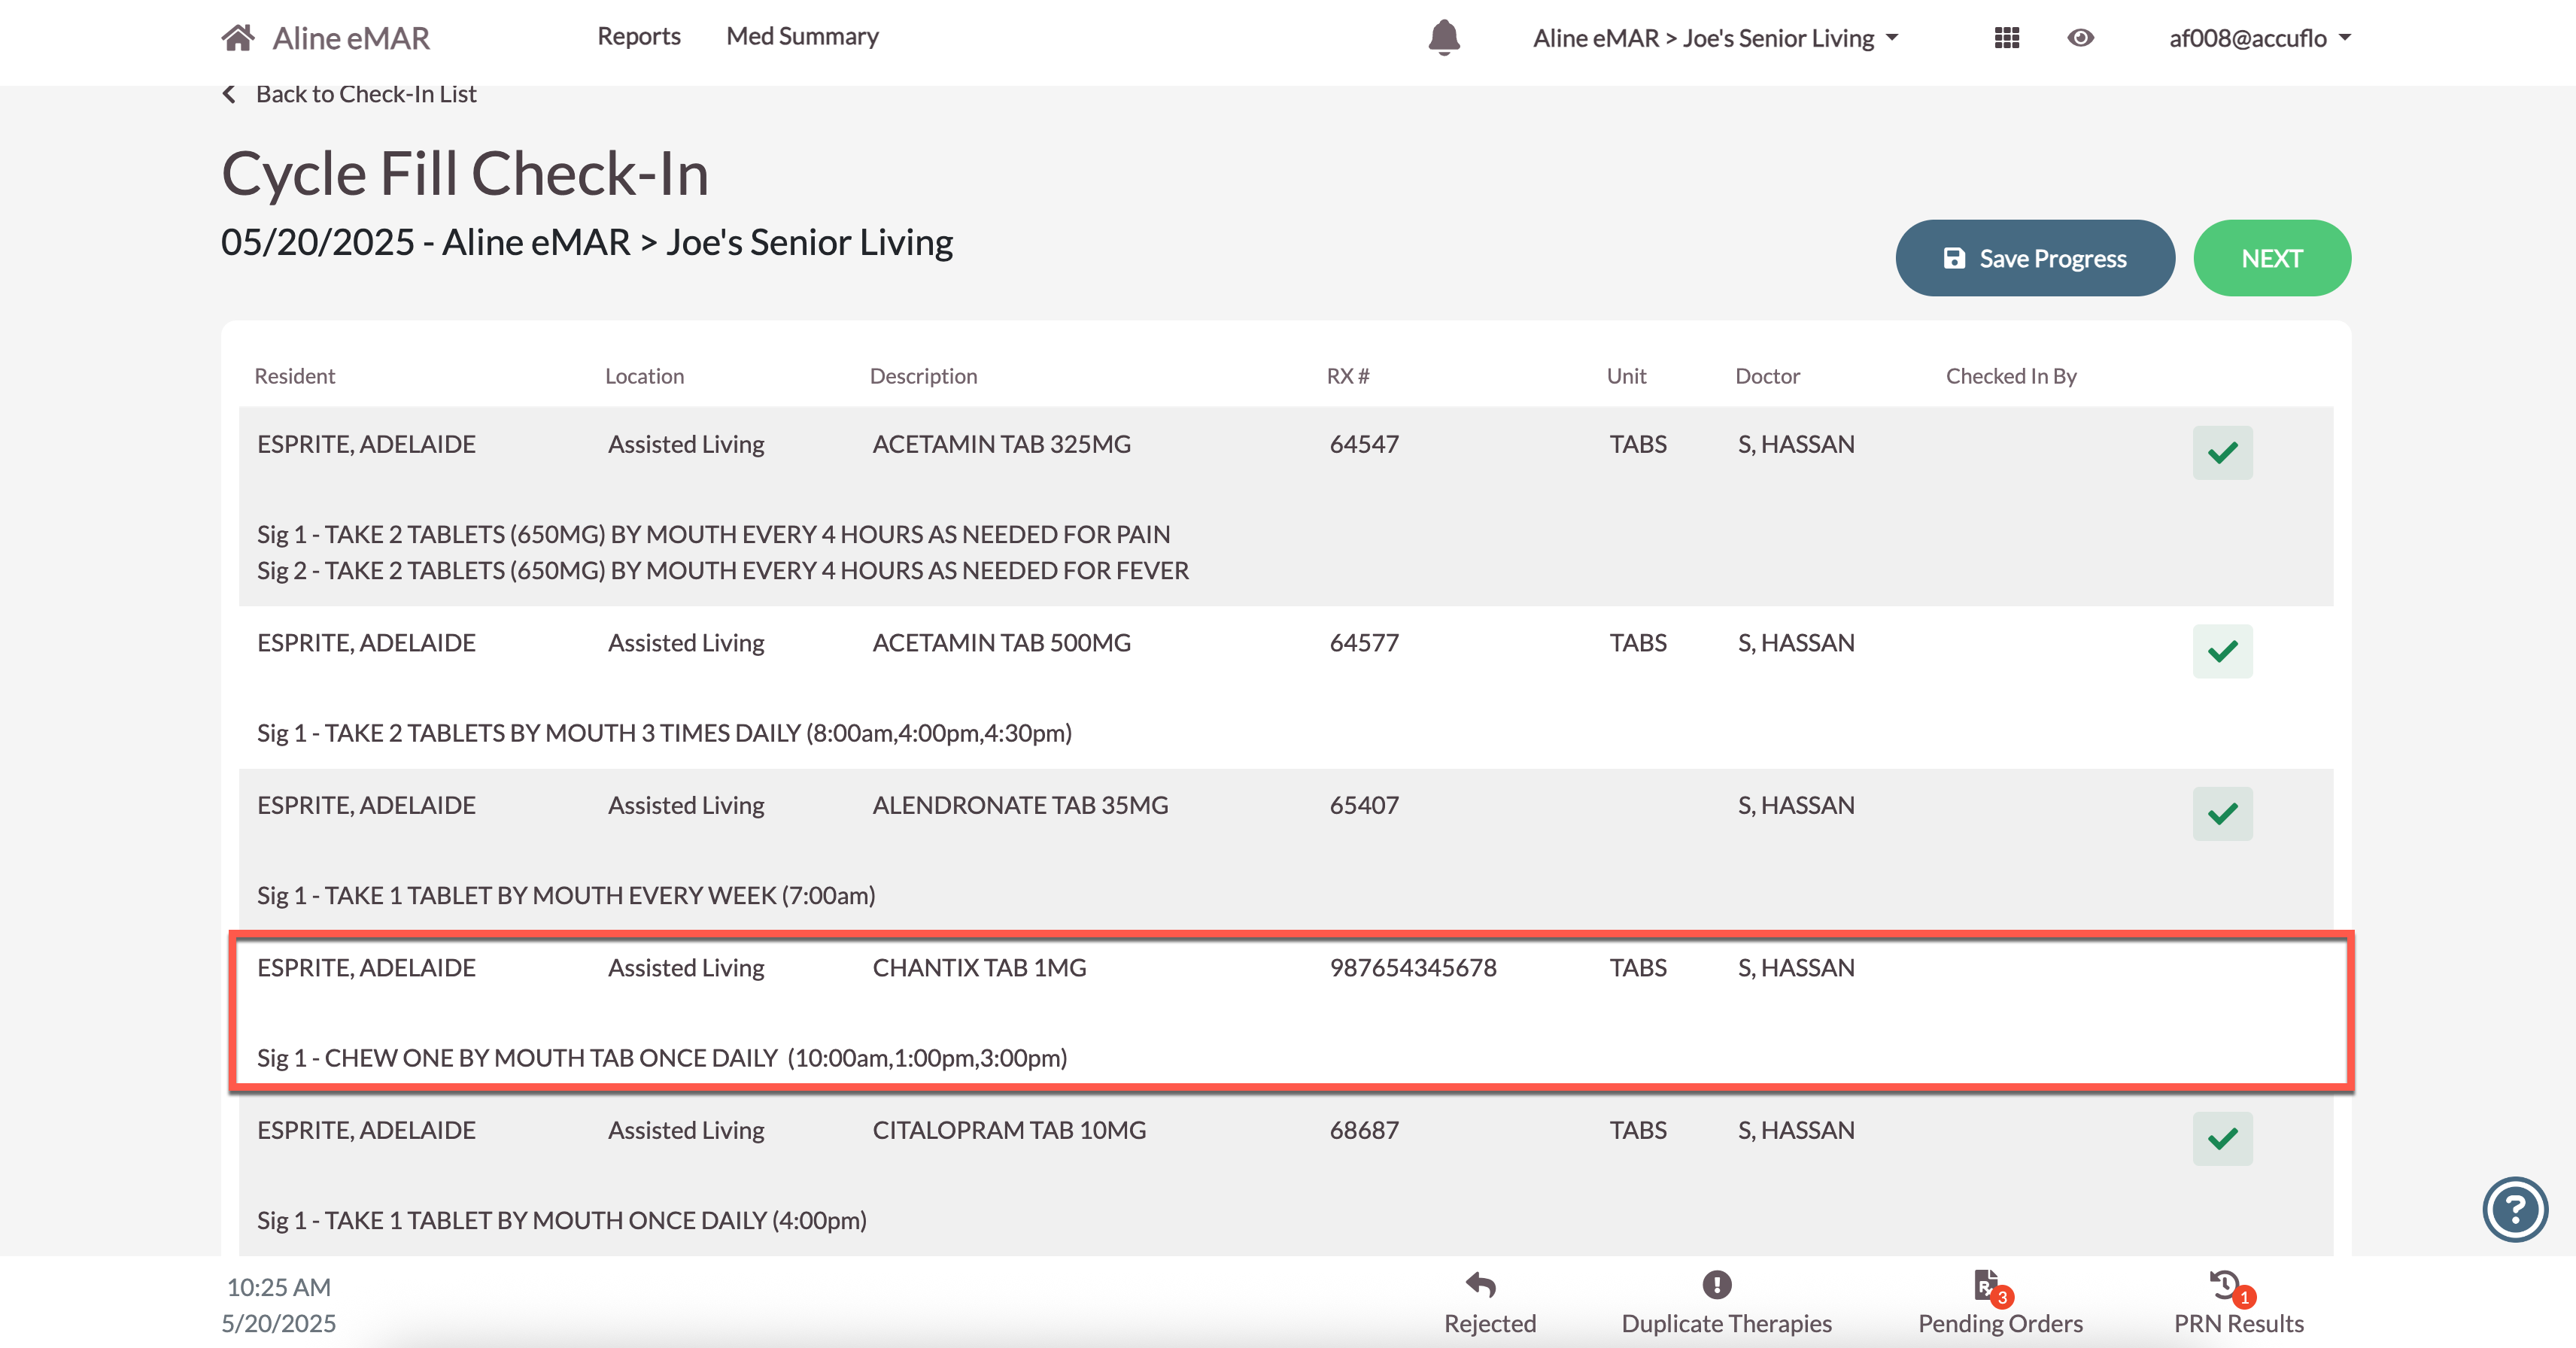
If there are any missing items, leave the item unselected on the check in manifest, as pictured below.
Please note: this process does not have to be completed in one sitting. To save your progress, select the Save Progress button. The Cycle Fill Check In will then display on the main Check In List where it can be resumed at any time by selecting it.
Step 4: Once the check in process has been completed, select Next.

Step 5: If any medications were missing from the pharmacy shipment, users can confirm the missing items, print the list, or electronically push the list to the pharmacy by selecting the Send list to Pharmacy button.
Select Next to complete the Cycle Fill Check In.

A confirmation message will display. Select Complete to close the current check in.

The user will be taken back to the main Check In List page. The completed check in can now be reviewed by selecting it - reporting is also available by selecting the report icon on the right hand side of the completed check in.

Was this article helpful?
That’s Great!
Thank you for your feedback
Sorry! We couldn't be helpful
Thank you for your feedback
Feedback sent
We appreciate your effort and will try to fix the article