Overview
In this article we will review the process of administering routine orders.
Instead of using the paper MAR and TAR, ACCUflo will be used to administer and record the results of medications and treatments. Once users are logged into ACCUflo, they can begin the medication pass. The residents assigned to the Selected Group will display onscreen.
Show/Hide Icon
Users should remember to use the Show/Hide Icon when the med cart must be left unattended.
Note: Select the Show/Hide Icon to hide the screen before leaving the med cart computer unattended.
 |  |
Note: Select the Show/Hide Icon to unhide the screen when returning to the med cart computer.
Resident Status
If a resident has a status of LOA, Hospital, or Bed Hold selected, the resident’s screen will display “Couldn’t find any orders.”
Note: Orders cannot be administered when a resident's status is anything other than 'Active' or 'Discharged'.
Charting Options
Depending on how each facility is configured, you may see more then the default options of Administer and did bot administer medications when charting.
Note: Home Health and Self-Administered charting options are optional and set up in configurations.

- Administered
- Did Not Administer
- Home Health (optional)
- Self-Administered (optional)
Procedure for Administering Routine Orders
Step 1: To begin a medication administration, select the desired resident on the Main Residents’ Screen.
Note: Alternatively, if scanning is enabled, users can scan a barcode on the resident's medication packaging to be automatically taken to the Resident's Screen and have the order selected if it is currently due.
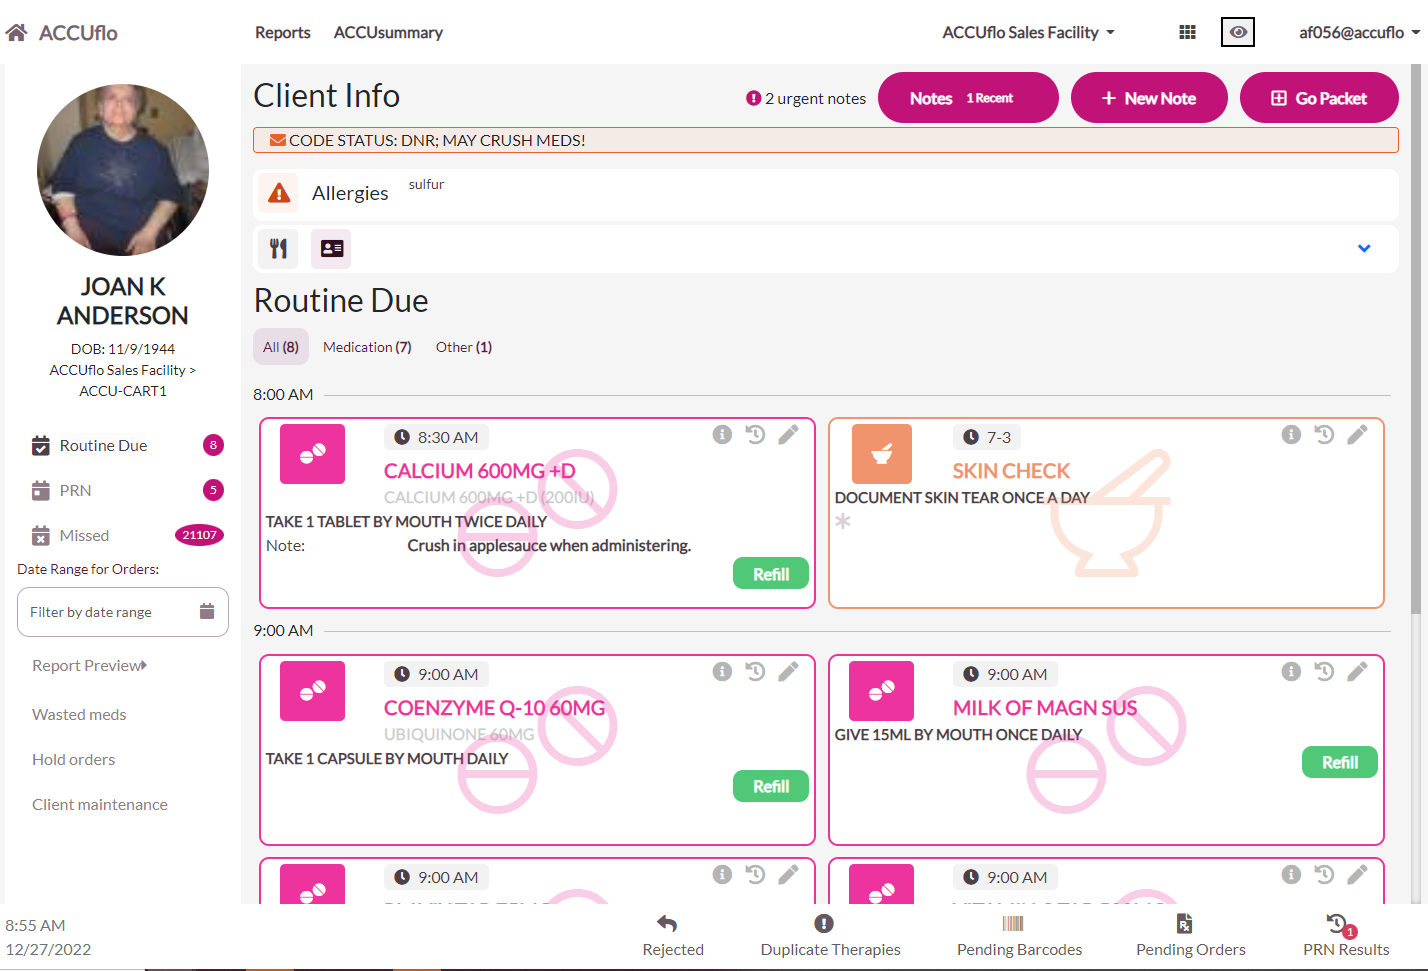
Step 2: The Resident’s Screen will display all orders due to be given at this time. Users can narrow the view to a specific order type by selecting a specific order type from the Header Tabs.
Step 3: To select an order, users can click the desired order tile on the screen or, if scanning is enabled, users can scan the barcode on the medication’s packaging.

- The order tile(s) will now have a check mark, the background will go from white to color, and the border will be darker indicating that the order has been selected for administration.
Step 4: Once all orders ready to be administered have been selected, users should hide the screen using the show/hide icon if they must leave the med cart computer unattended during the administration.
Step 5:Upon returning from the administration, the orders are ready to be charted as:
- Administer: Used if the orders were given to the resident and completed.
- Did Not Administer: Used if the orders were not able to be completed. Do not select this option if the orders may be administered later—orders should be charted as Did Not Administer once users are sure the orders will not be given.
- Self-Administration: Used if the resident or the resident’s family administers the orders.
- Home Health: Used if a staff member from Home Health, a Hospice nurse, etc. administers the selected orders. Refer to the community’s policy for correct use.
Once the orders have been charted, they will no longer display on the Resident’s Screen. To return to the Main Residents’ Screen, users can select the Home button.
Note: If the community has enabled the Black Box Warning feature or the Give Quantity Warning feature and there is a warning associated with a medication or a quantity set above one, the Black Box Warning and/or the Give Quantity Warning will display when the medication is selected. Read the warning and selected Close. Any urgent medication notes will also display when the medication is selected.
If an order was not checked in prior to an attempt to administer a pop up will appear that warns the user to go to Medication Check In to check in the controlled substance prior to administration to keep the count accurate.
Was this article helpful?
That’s Great!
Thank you for your feedback
Sorry! We couldn't be helpful
Thank you for your feedback
Feedback sent
We appreciate your effort and will try to fix the article